Embroidery is the art of making beautiful fabric designs that has been used for centuries. There are even examples of embroidery dating back to the 5th century BC Trusted Source Embroidery - Wikipedia The art of embroidery has been found worldwide and several early examples have been found. Works in China have been dated to the Warring States period (5th–3rd century BC).[4] In a garment from Migration period Sweden, roughly 300–700 AD, the edges of bands of trimming are reinforced with running stitch, back stitch, stem stitch, tailor’s buttonhole stitch, and whip-stitching, but it is uncertain whether this work simply reinforced the seams or should be interpreted as decorative embroidery. en.wikipedia.org . This is a beautiful form of arts and crafts, but there is the possibility for mistakes in both hand and machine embroidery, particularly for beginners.
If you would rather not see your mistakes glaring at you from your embroidery project and want to start over, or simply reuse the fabric for a new project, you need to know how to remove embroidery.
Fortunately, this is easier than you may have imagined. Here we’ll explore how to take out embroidery from your projects.
Before you get started, you’ll need to gather the tools for how to remove machine embroidery or hand stitching.
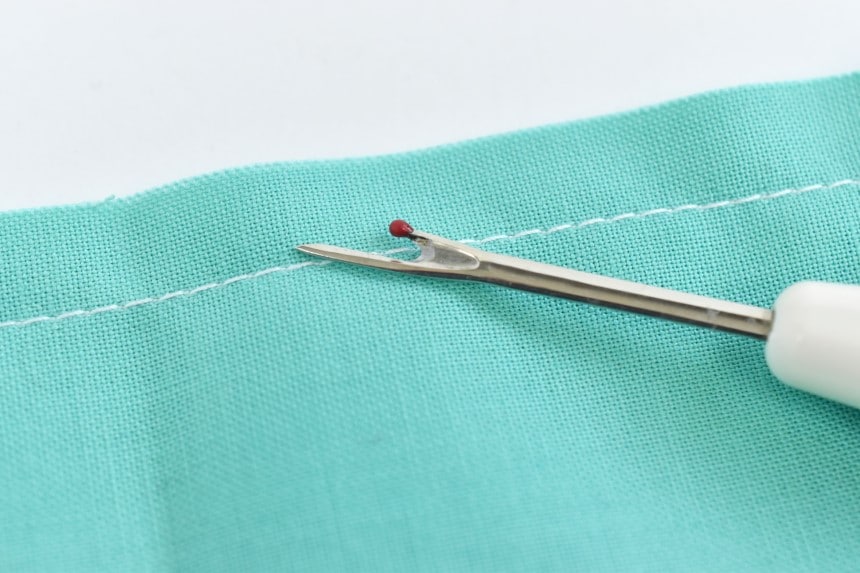 This is a small, pointed tool that is available in different sizes and styles. The best seam rippers have a comfortable handle and a sharp head that can be inserted underneath the thread to remove unwanted stitches. There is often a rubber tip to erase any leftover threads.
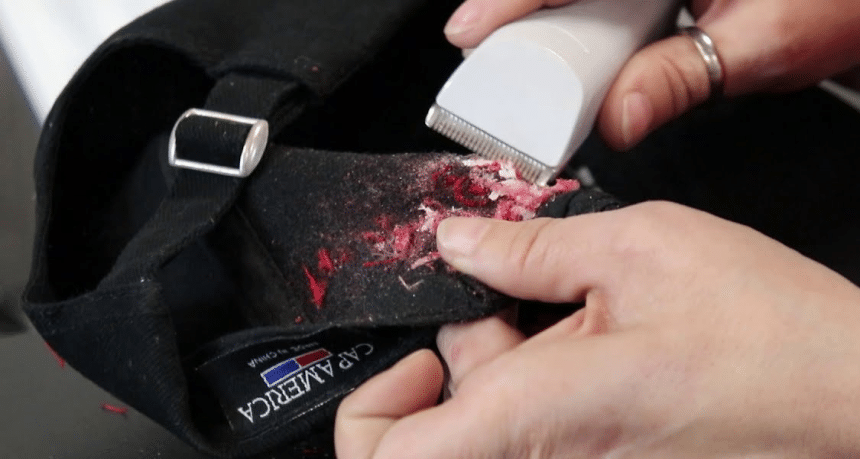
An embroidery eraser is a powered divide that looks a little like a beard trimmer. This can be applied under the stitches to clip the threads. This is easy to use and can remove more stitches at a time compared to a basic seam ripper. Embroidery erasers are best suited to professional machine embroidery rather than hand stitching.
Removing embroidery can be a delicate task, particularly when you’re working with thin threads and small stitches. So, a magnifying glass can help you to zoom in and see precisely what you’re working on.
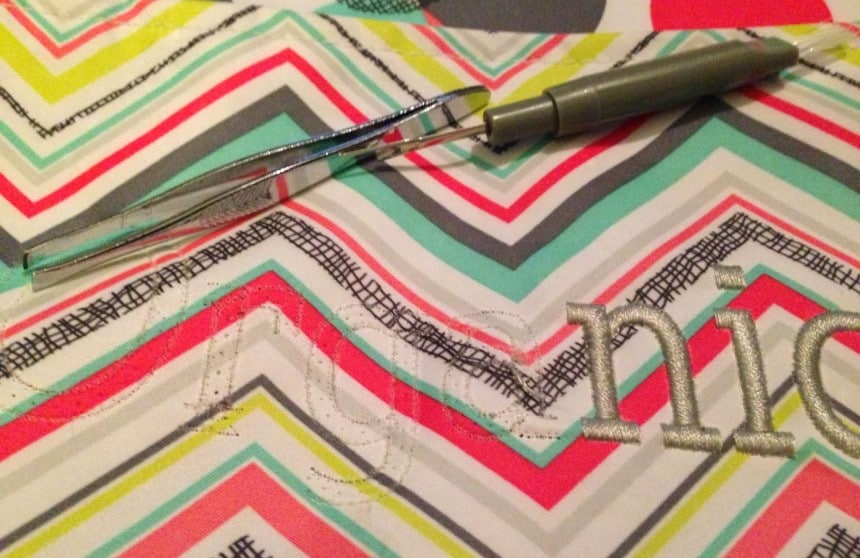
While easy to overlook, a basic set of tweezers is an ideal tool to pull small stitches that you may struggle to reach with your fingers.
A lint brush or roller is handy when you’re removing embroidery. It helps to remove small pieces of lint, dust or fuzzy threads from your fabric, so you can see what you’re working on. If you don’t have a lint roller or brush, you can use adhesive tape in a push.
It is not always possible to remove embroidery, due to the fabric. Some fabrics are more vulnerable to large holes from removing the stitches. For example, if you’re wondering how to remove embroidery from polyester, you need to be aware that the stitch holes may get larger after washing the garment. So, you may wish to reconsider removing the stitches.
If you’re unsure if you may damage the fabric, try removing a little of the embroidery in an inconspicuous area. Once you remove a few stitches, you’ll be able to see if the fabric can handle it. If it isn’t feasible to remove the embroidery, it should be easy to fix the few stitches you removed.
If you do have a project where you can’t remove the embroidery, you could always hide the embroidery by embroidering over the top or adding ribbon, lace or pearls to change the look of the piece.
 Even if you’re using the best embroidery software, it is possible to make mistakes, so an embroidery eraser will be a worthwhile purchase.
To use the eraser, you should turn the fabric over, so you can see the back. Using an embroidery eraser can scrape on the fabric and may cause a little fuzzing. So it is best to protect the front of the material, as it will be visible. Additionally, embroidery is typically thinner at the back of the fabric, so it is easier to cut through.
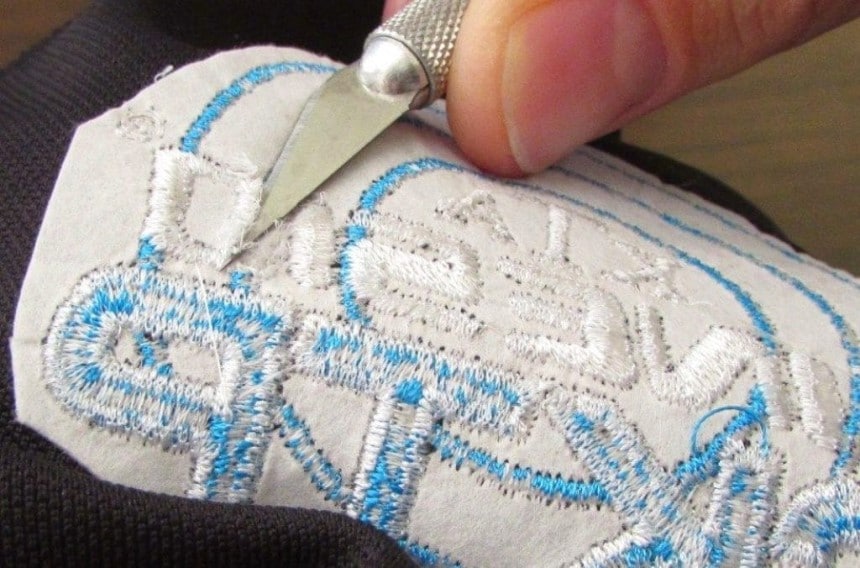
If your embroidery has a stabilizer attached, you’ll need to tear this away before you begin. Start against the edge and ensure the blades dig into the thread. Then slowly push it forward by approximately one inch.
Lift the eraser and move to the next segment, working your way across the embroidery. Keep going until you remove all the embroidery. However, if you’re removing a logo, you can move across the entire width of each letter per segment.
Turn the fabric back to the front and use your seam ripper to remove the stitches by hand. Simply slide the seam ripper under the loosened stitches or scrape off smaller stitches with your fingernail.
Not all stitches will come off after the first pass. So, if necessary, you will need to flip the fabric on to the back and repeat the process.
Once you have all the stitches removed, use your lint roller on both the back and front of the fabric to remove any bits of lint or other debris from the stitches.
 Some projects are not suitable for use with an embroidery eraser. For example, if you’re wondering how to remove embroidery from leather or how to remove embroidery from a nylon jacket, you may be better using a seam ripper. This will be slower, but it will allow you more control. A seam ripper is also the best choice for hand embroidered items.
Regardless of whether you’re looking at how to remove embroidery from a hat or how to remove embroidery from a shirt, the method is the same. The first step is to turn the fabric inside out. This will allow you to see the stitches and get a clear view of what you need to remove. As with an embroidery eraser, you can also avoid damaging the front of the fabric.
You may also find it easier to place the item back into your embroidery hoop. Using a hoop will straighten the fabric further for more precise work.
Place the seam ripper under the threads and turn the hook. This will cut the threads, so you may be able to remove just one stitch at a time or several. Just be sure to work slowly and gently, starting with small pieces of thread to avoid fabric damage.
Once you have ripped through the stitches, you will have a lot of lost threads. You can remove these by hand, but you need to use your magnifying glass and tweezers to pull out the smallest threads. If any threads are stuck, gently cut these with embroidery scissors.
After removing the loose threads, use your lint roller to brush the fabric to remove any debris or leftover threads. Be sure to do this on both sides of the fabric.
While we’ve covered the basic techniques for removing embroidery, there are also some tips to help you do the best possible job.
While it may be tempting to try and get the job done with whatever tools you have on hand, you may struggle to do the job well. It is far easier to remove embroidery if you have the right tools. So, be sure to check our list above to make sure you have everything you need before you get started.
 We’ve covered this above, but it is worth reiterating. You should always work from the back of your fabric. Whether you’re removing the embroidery from clothing, a bag or another item, you will make the task easier if you have full access to the threads.
Some embroidery has layers and layers of stitches. This makes it more challenging to remove it, so be prepared and take your time.
Don’t just start anywhere, pay attention to where the threads go. Typically, you should start on a corner to guide your seam ripper and get a clean cut. You should also make a note of where you began, so you can keep track of the project.
Finally, be sure to take your time and work slowly and cautiously. This will help you to do a solid job and not risk damaging your fabric or cutting yourself with your seam ripper, tweezers or scissors.
An embroidery eraser works best on professional embroidery that was done by machine. So, you may struggle to put it in a hoop to remove the stitches. However, if you’re removing hand embroidery, it may make it easier to use a seam ripper if you put the fabric back in a hoop.
If you’re looking at how to remove embroidery stitching, you may have concerns about holes in the fabric. These holes are actually where the threads of the material were pushed aside by the embroidery thread. Depending on the type of fabric, these small holes may be more obvious than with others. In many cases, you may be able to iron the fabric, which will straighten up the material threads.
Embroidery marks are common when you remove stitching from fabric. Fortunately, there are some easy solutions to remove these marks. For example, using an iron to straighten out the fabric fibers can eliminate these marks. You can even use your fingernail or a spoon to gently scratch the surface of the material to even up the fibers.
Monograms are similar to embroidery, so they can also be removed using the same techniques. However, monograms are often machined on to the garment, so you’re likely to have the best results with an embroidery eraser.
If you don’t have a seam ripper but want to try removing some embroidery, it is sometimes possible. Try carefully using embroidery scissors to snip the threads. You can slowly slide your scissors under three to four stitches and cut the bobbin threads. Just be careful to closely watch your cuts, as you can easily cut the fabric by accident.
It is possible to remove embroidery with backing. You’ll need to follow the steps listed above, but before you can get started, you’ll need to remove the backing.
Whether you’ve made a mistake with your embroidery project or simply want to reuse some fabric, you need to know how to remove embroidery. While this may seem like a difficult task, it doesn’t need to be. There are some simple steps that can help you remove embroidery and fix your project.
With some basic tools, or even investing in an embroidery eraser, you can quickly and easily remove any unwanted stitches. Just be sure to take your time to get the best results.