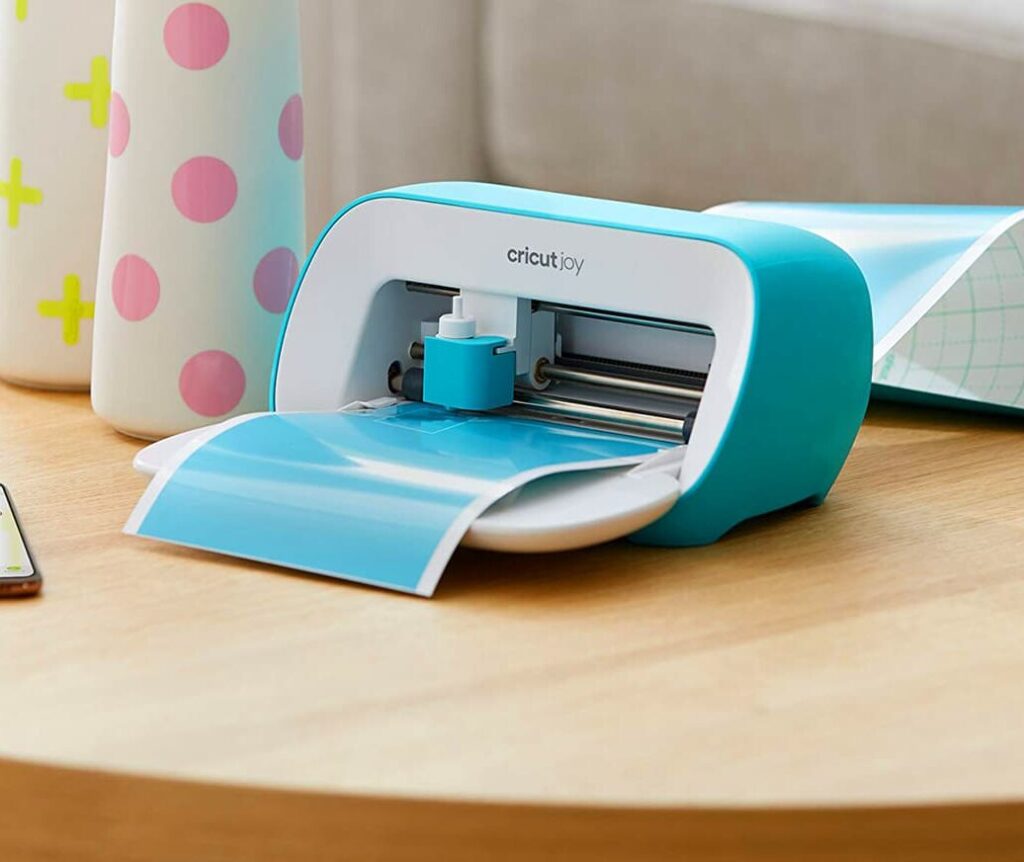
Cricut machines are a great way to bring out your crafty side and make different creative projects on your own. Cricut has been in the market for ages which makes their products extremely reliable. The company is most known for its extremely functional cutting machines.
While it may sound complicated, slicing is fairly simple and today, we will be walking you through different steps on how to slice on Cricut.
The great thing about Cricut is that it comes with its own design software that allows you to create different designs on your computer and then transfer it to your machine. Not only does this make the process extremely accurate and precise, but it is a lot faster to do this way as well. With the Design Space app, you can also slice different images. Let’s dive in!
The Slice Tool is one of the 5 basic tools that comes with the Cricut Design Space. Apart from the Slice Tool, the Design Space also comes with the tools to weld, attach, flatten, and contour. However, its slicing tool is one of its most important one. The purpose of the Slice Tool is really basic: it is used to cut two overlapping images out of each other. While it may sound very simple, you can use this tool for many different uses.
The Cricut slice tool is an extremely important tool that can help you slice down two overlapping images into different pieces. The Slice Tool essentially applies the cut lines on the two images at the same time. Once it’s done, you end up with a shape of the image cut out from the other.
Using the Slice Tool, you can perform many different functions, such as:
The Cricut Design Space app comes with many different tools that can help you work on different projects. The Slice Tool is also one such important tool that can be used for many different functions.
To make it easier for you to use these functions, we will be guiding you through these functions step by step!
Let’s get slicing!
One of the many uses of the Slicing Tool is to slice two images. Here is how you can do it:
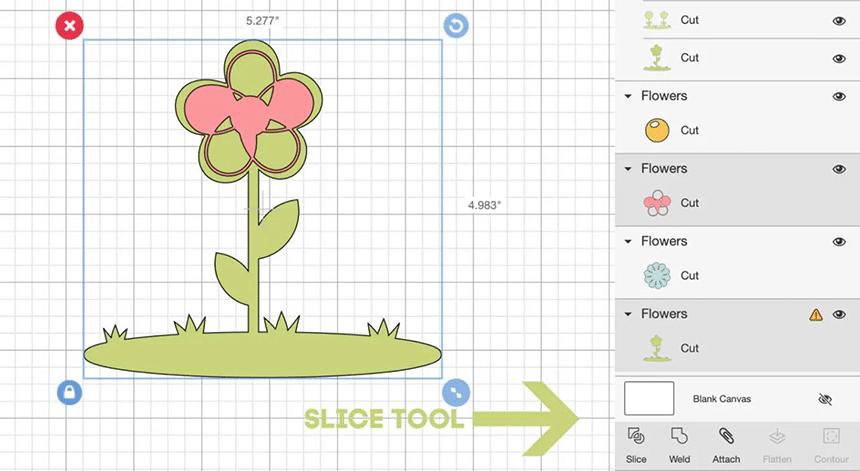
Step 1: The first thing that you need to do is to add two single-layer images to your canvas. The reason why these images have to be single-layered is because you can only slice two images at a time. For the Design Space, you can also search for images by clicking on the “Images” option in the panels. You can either access the gallery and get an image from there or even upload images of your own. Whatever you do, make sure that they are single-layered.
Step 2: For the next step, we will overlap the images. To do so, you will need to put your selected images on top of each other. You can place your image in whatever position you want to cut it out.
Step 3: After positioning the images, highlight both of them. To highlight the images, you can either click and drag to highlight or you can also highlight them one at a time while holding the down command, in case of a Mac or the shift command in case of a Windows computer. After this, a bounding box will be visible around the two images while showing the individual layers being highlighted.
After the selection of the two layers, your Slice Tool becomes active.
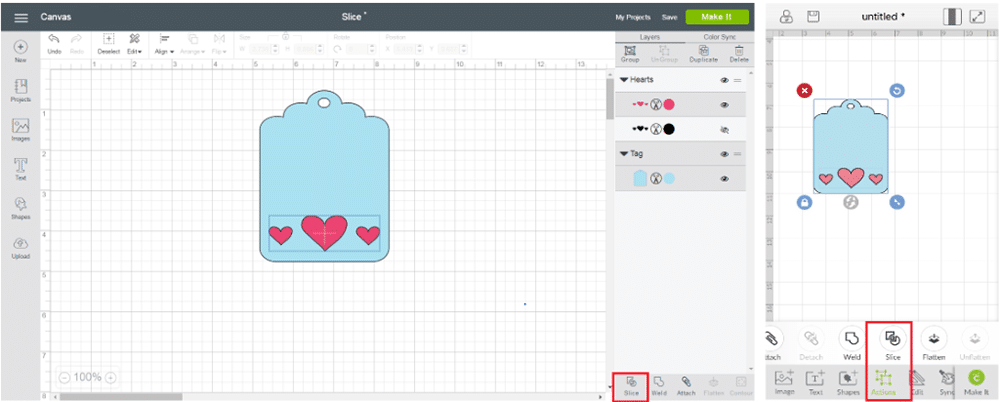
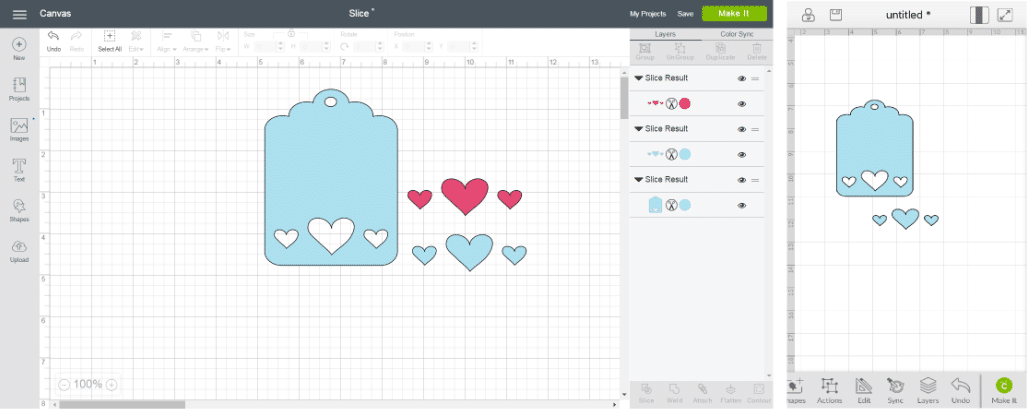
Step 4: To slice the images, tap on the Actions button on the Design Space. Then, click on the slice option over there. After clicking, you will see the new images in the layers panel. All hidden layers will be removed here.
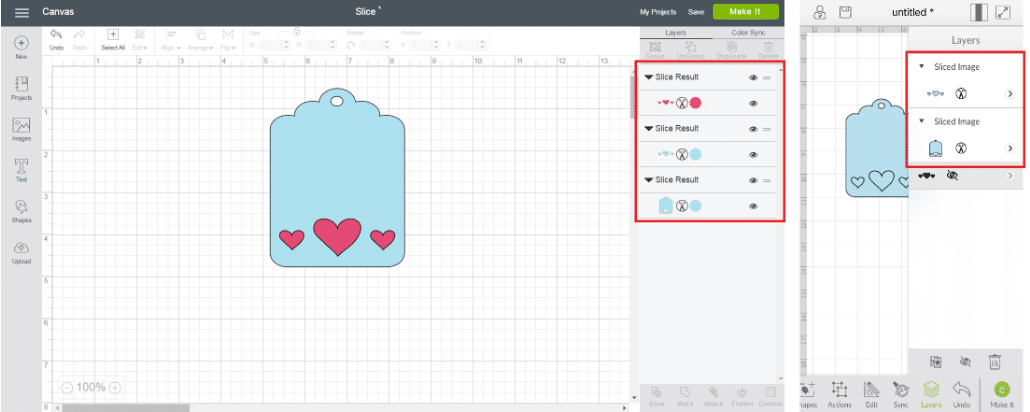
Step 5: Lastly, you separate the layers to see your new shape. After reviewing, your new image is ready!
With the Cricut Slice Tool, you don’t have to restrict yourself by working with images only. In fact, you can even slice texts and images. Here is how:
Step 1: Firstly, you would need to insert the image and the text onto the Design Space. Similar to the process above, make sure that the image is single-layered. With the Slice Tool, texts work a bit differently. For example, you can use a multi-layered text if one layer is hidden. However, the Slice Tool does not work when there is a shadow layer on the text, unless it gets ungrouped to different letters.
Step 2: After selecting our text and image, we will overlap them with each other. You can place the text on your image in whatever position you want. You can even move things around to see what position you like the best.
Step 3: After positioning the images, highlight both the image and the text. After this, a bounding box will appear, and your Slice Tool becomes active. If you still have not figured out how to use a Cricut machine, you can always look around for guidelines on how to use it properly. This will ensure that your end product is of great quality.
Step 4: To slice the image and the text, click on the Actions button and choose the slice option over there. After clicking, you will see the layers in the layers panel. All hidden layers will be removed here.
Step 5: Your end result would be your sliced image and text! This is how easy it is to slice, while using all the correct tools.
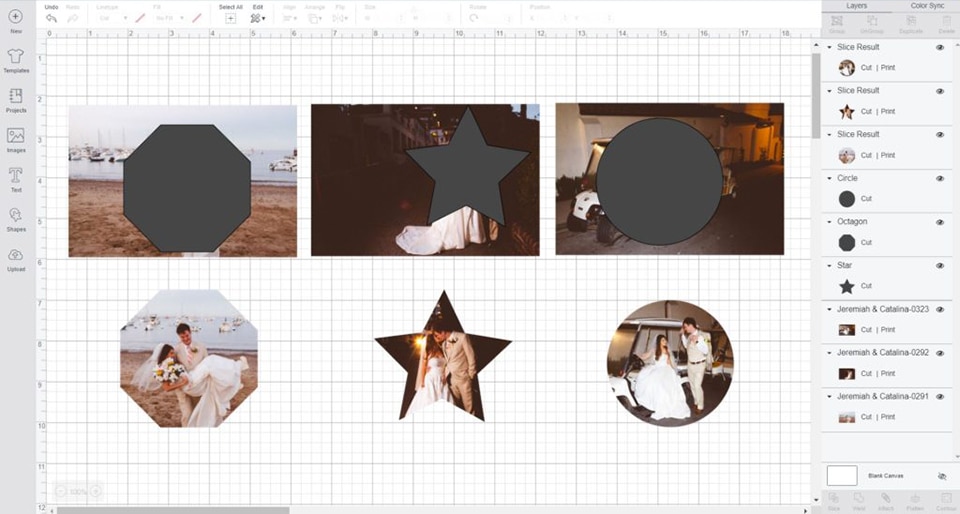
Among its many functions, the Slice Tool can also be used to crop out an image. The process is extremely simple and easy to follow:
Step 1: To crop an image on the Design Space, first launch a new project. Once you have done that, you add an image. You can choose any image from their library or even upload some of your own.
Step 2: Once you have selected your image, decide beforehand which segment or which part you want to crop. There are no limits to the size and shape that you crop out. You can go as creative as you want.
Step 3: To start the cropping process, insert a shape on your image to cover the part of it that you want to remove or crop out. During this process, make sure that you select the shape first while holding the command key, and then you move on to selecting the background image.
Step 4: You will find the “slice” option on the lower right corner of the Design Space. Click the option. Once you have clicked it, the Design Space starts to process while separating the layers. After this has been done, you can remove any part that is unnecessary.
Step 5: You can use this function to crop out any image that you want, using the best Cricut machine.
Another function that comes with the Slice Tool in the Cricut is the cut out function. The cut out function allows you to cut out any shape from the image, even if they are overlapping or in text form. To cut out images, follow the following steps:
Step 1: Firstly, you would need to select and load your images. After you have done that, make sure that the images are overlapping each other.
Step 2: After overlapping the images, select both of the images. There are different ways to do this for computers or phones. For either Windows or Mac, you can select the images with the Shift or the Ctrl key, while clicking on the layers. Here a bounding box will appear and help activate the Slice Tool. For iOS or Android devices, you would need to tap the screen and select the layers. Here, the Slice option will be available at the Actions function.
Step 3: Click on the slice option and look over at the images that appear on the Layers panel. Next, select a shape and position it where you would like the cutting out to take place. After positioning, you would need to click the slice again.
Step 4: The Design Space software will process this and delete an unnecessary part of the image. With this feature, you can carefully remove whatever is unneeded. This would be ideal for DIY projects, especially when you are designing your own shirts.
There are many devices that are compatible with the Cricut itself. You can connect these devices over Bluetooth and use Design Space anywhere. Many people like using the Slice Tool on an iPad as it provides its users with an ample amount of space and freedom to work with. This is especially great if you are a beginner and are working with some beginner-friendly Cricut machines.
Unlike iPhones, iPad allows you to see the panel completely. With a phone, you would usually have to tap on the menu so that you can see the options available. With an iPad, that is a rarity. In fact, even the layer button is visible to you at all times on an iPad.
However, there are some features on the desktop version of the Design Space App that are not available on the iPad version. Some of these features include the options to Select All, Curve Text, Ungroup layers and lines, different templates and patterns, and the SnapMat Trusted Source Using SnapMat on Cricut Design Space - Makers Gonna Learn Cricut By MakersGonnaLearn.com, ideas for your Cricut Explore, Silhouette and other cutting machines. makersgonnalearn.com . But worry not, even with an iPad, you can perform the most important function of all: Slicing!!
To use the Slice Tool on an iPad, follow the following steps:
Step 1: After loading your images/texts, place your layers where you would like to slice. Make sure that the images overlap each other.
Step 2: Select both of the images. For an iPad, this option is available in the “Selecting” part. As soon as you select two layers, the Slice tool gets activated on your Design Space App.
Step 3: As soon as your slice option is activated, tap it. You will find the slice option in the “Actions” panel on the side. This will slice the image into two different parts.
Step 4: Your image will be sliced once they change into the same color and be visible to you as separate layers. These layers will be visible in the layers panel as the sliced image. You can even use the slicing tool to ungroup layers from any image.
There you have it!! It is extremely simple and easy to slice on a Cricut machine, using an iPad. You can make your experience even better by using some essential tools.
The great thing about the Cricut Design Space is that it allows your creativity to run wild. You can choose any possible tool and come up with the most amazing results. Similarly, with the Slice Tool, you can create anything. You can use slicing for:
The possibilities are endless with the Slicing Tool. Once you have mastered the steps mentioned above, you can create as many DIY projects that you want.
Before using the Slice Tool, you should know some of the basics:
Find answers to the most frequently asked questions about slicing in Cricut Design Space below.
While using the Slice tool on Design Space, you may sometimes find the Slice button greyed out. However, when this happens, there are some specific steps that need to happen for the Slice tool to get activated. Once the Slice tool is not grey, it has been activated and you can use it easily. To prevent the greying from happening, make sure that:
While selecting an image, you might select an image that has been grouped with a hidden layer. This hidden layer disappears once the Slicing tool has been run. This is because slicing happens for visible shapes and once the image has been sliced, the Design space app will remove unnecessary parts by itself.
To get the hidden layers, make sure that you have either ungrouped them before slicing. If you do not hide the layers, then they will still be present, even after slicing.
The Cricut Design Space treats text as a single-layer image. Thanks to this, you would not have to make any changes to get the text ready for slicing. However, the Slice Tool usually deals with shapes which means that after the slicing process has been done, it converts everything into a sliced result. Even if the shape of your text does not change, it becomes a slice result instead of being an editable layer.
You can easily solve this problem by making a copy of your text before slicing. The copy can be set aside and edited later on.
With the Cricut Slice Tool, you are able to cut any overlapping sections of two images. This means that if you put any small sized image on top of a large sized image, the Slice tool will cut out the smaller image. With this, you end up with three layers that consist of the original small sized image, and two layers of the larger image. To prevent this, overlap the two images in a way that they don’t cover each other completely.
As seen above, there are many different ways as to how to slice on Cricut machines. You can use the Slice Tool to perform many different functions, including slicing images, slicing text and image, cropping, and cutting out. This tool is extremely useful for many projects.
You can use the Slice Tool on the Design Space app very easily. The above-mentioned steps are extremely simple and easy to follow. Hope this article helped you understand how to work the Slice Tool on the Cricut Design Space Trusted Source Cricut Design Space design.cricut.com !