Like any technical process, 3D printing has its own lexicon and some of the terminology can be confusing even if you’ve been printing for a while. Sometimes the details are not much of a consideration as you start to learn how to print. But, as your skills develop you may become curious about what some of these terms mean and how they may apply to your printing. A common source of argument is raft vs. brim and you may have heard these terms on social media. They may seem confusing, but in reality they are easy to understand when you dig a little deeper into 3D printing.
Essentially, the terms skirts, rafts and brims refer to how you prime the nozzle to build up the main print or how you keep the print stuck to the bed by increasing the bed adhesion. Many people prefer to use a skirt when they prime their 3D printing nozzle. Using brims and rafts is a less common approach, but it will create a good foundation layer for your printing. In this brief guide we will take a closer look at the raft vs. brim vs. skirt base layering techniques to help you improve the quality of your 3D prints.
It doesn’t matter if you have a basic printer or the best 3-in-1 3D printer on the market, you will still need to establish the first layer of filament cleanly for a good print.
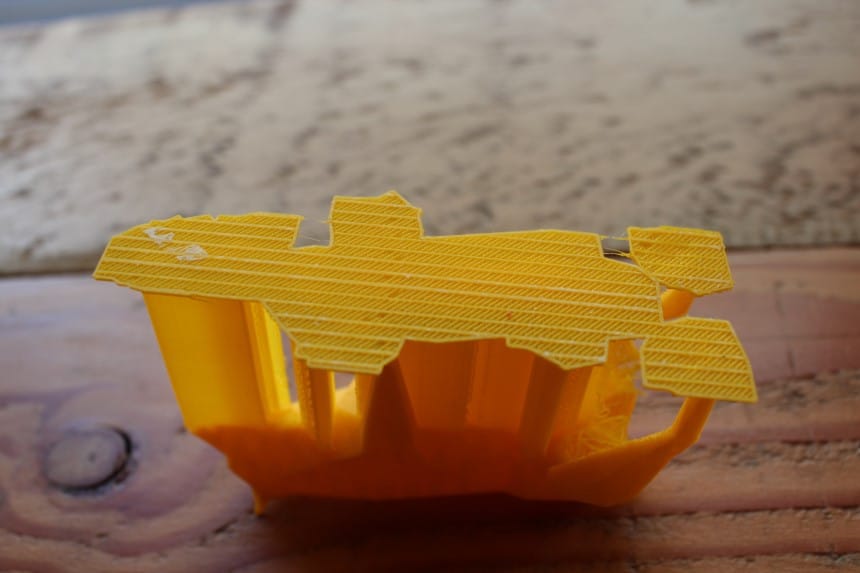
The 3D print raft is that primary layer of horizontally orientated mesh that is placed directly onto the printing platform.
There are three main 3D printing raft uses that we will show in a little more detail below, they are:
 Settings
Using a 3D printing raft vs. a brim approach can be a successful strategy if you get your settings correct. It’s important to adjust the separation distance properly when you’re using a 3D printing raft on your print. The separation distance in the space between the initial layer of the print and the 3D printing raft. This can also be the distance of the mated layers located between the model and the printing raft. When you choose a tight separation distance it can be tricky to separate the raft from the model being printed. The ideal gap between layers is 0.1mm for most prints, let’s take a closer look at using a 3D printing raft with the bottom and top layers and the offset you need:
This is important because it’s the initial layer that’s deposited onto the surface of the building platform. As such, it needs to be a thicker layer and it’s a good idea to print it at a lower speed. Adopting this approach will ensure that you get sufficient bed adhesion to prevent a printing failure. If you achieve poor bed adhesion it will compromise the model and a failure is far more likely. So, go with a thick first layer and a raft bottom of at least two layers will increase the print success ratio significantly.
This top raft layer will lay on top of your initial printing layer and it will determine the finish on the surface of the bottom printing layer. To get the smoother surfaces on your prints it’s advisable to add two or even three layers on top.
If you have a budget-friendly 3D printer or a more advanced model you may have a better slicer to help you with rail offsetting. These slicers have a built-in setting that allows you to determine the distance that your raft will extend beyond the edges of your print. If you have access to this slicer feature keep the raft just outside the print but don’t extend it too far.
There are many 3D printing techniques to suit various types of applications. All of them have their pros and cons and using a 3D printing raft is no exception:
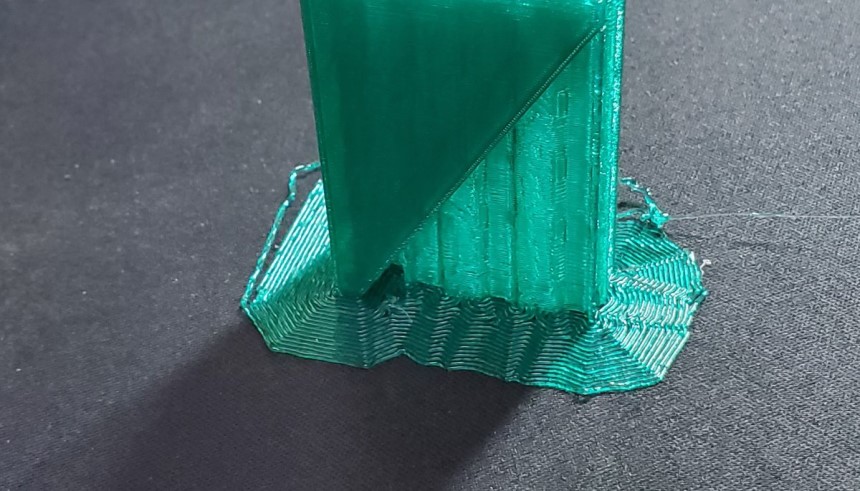
Now that we’ve taken a look at 3D printing rafts, it’s natural to consider the various merits of a brim vs. raft approach. This is a type of 3D printing raft that you only attach to the outside edges of your print. It isn’t positioned under the print like a raft and you can think of it as a kind of printing skirt that only touches the edges of the print model.
The purpose of the brim is to improve bed adhesion and to prevent any warping issues that could ruin the model.
There are four main brim uses that we will explain in a little more detail below, they are:
 Settings
Generally speaking, there are two vital settings when using brims that you can adjust to achieve superior printing results. Adjusting the brim width or line count will improve the strength of your object, but it can be harder to remove the brim from your print. The brim can be defined by a width in millimeter or it could be expressed as a line count. A line count is the number of brim contour lines up to the set distance. As a rule of thumb, a brim line count of 2-5 is sufficient for good adhesion and to prevent the print sides from warping.
Let’s take a look at the various pros and cons of using the brim technique for your 3D printing:
Using a 3D printing skirt can be a good alternative to using a raft or brim depending on the print. You may be using a 3D printer under 500 dollars or a more elaborate model but you can achieve good printing results with both using this technique.
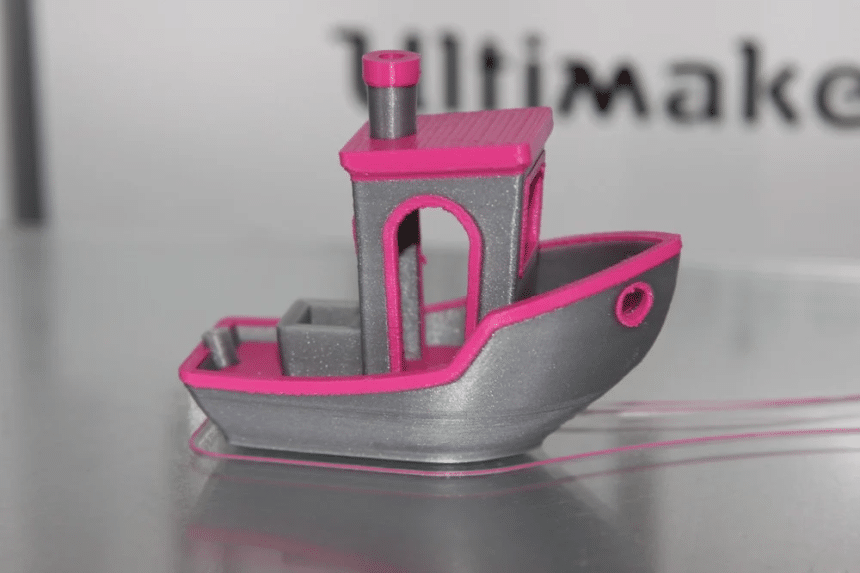
A printing skirt is an outline that surrounds the part that you want to print. This skirt will not touch the part as it would if you were using a printing raft or brim.
Essentially, using a printing skirt isn’t really a part of the 3D print brim vs. raft decision that you need to make before you begin printing. In fact, irrespective of the material that you’re using or the print that you’re making it’s a good idea to use a skirt. When you use a 3D printing skirt you can detect printing issues at an early stage which will save you time and money. This is also a great way to access some useful functionality when priming the extruder for superior printing results.
 Settings
There are a pair of important settings to control a 3D printing skirt, they are: skirt distance and skirt line count. The skirt distance is the distance between the skirt and the object you are printing. The skirt line count is the number of lines that you will print in the outline. Adding a single skirt line will be sufficient for most prints, but if you’re printing in a smaller area you may not get enough priming for the extruder. In this case using a skirt line count of three lines will ensure that you get adequate priming for the print.
Let’s take a closer look at the pros and cons when using a 3D printing skirt on your next print:
Hopefully you now understand the differences between printing rafts, brims and skirts. As you can see they are quite different printing techniques with their own advantages and disadvantages to consider. When you’re examining the cura brim vs. raft debate you will soon discover that one technique is not superior to the other for every printing project. The primary concern is to prime the nozzle to get the best bed adhesion while avoiding excessive amounts of waste. You may have the best 3D printer under 1000 dollars but you still need to consider your technique carefully. When you consider a raft vs. brim approach for your next print remember that adding a skirt is always an option.