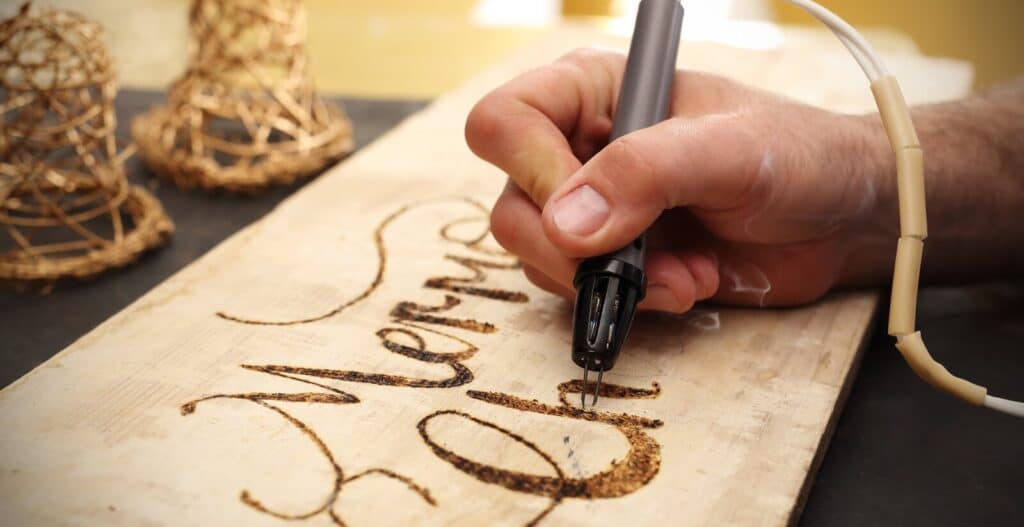
For wood-burning projects, it is advisable to have a pre-drawn pattern on the surface of the wood before you start using your pyrography equipment. This keeps you from making mistakes that you can’t erase or reverse. Some people are so artistically gifted that they can afford to draw their designs on the wood by hand. However, the vast majority of us can’t draw to save our lives, so you should learn some tips on how to transfer wood-burning patterns.
There are several methods you can use for pattern transference. As such, the option you pick will likely depend on your budget, the tools you have on hand, the complexity of the pattern, and the results you want. We’ll discuss these transference methods below and leave you to pick the option you want to use.
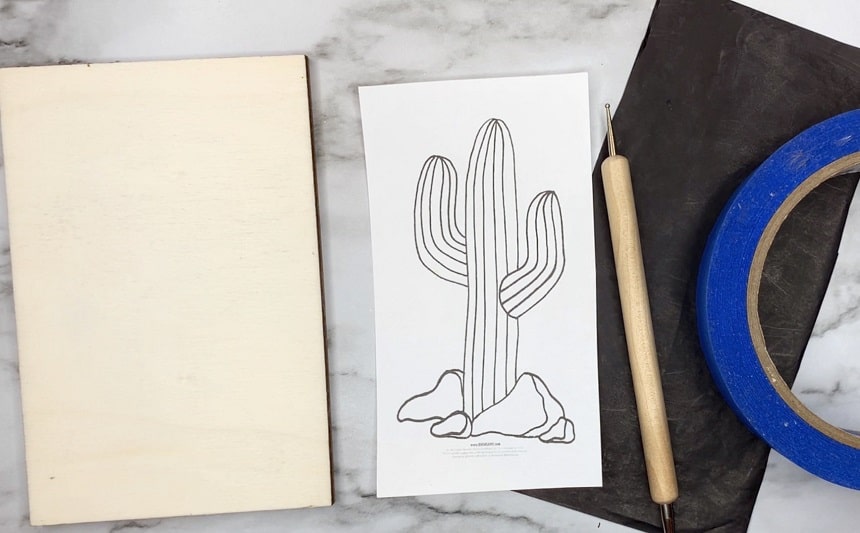
First, you want to set up your DIY workshop for the project. Start by getting the pyrography toolkit ready. Clean the wood-burning tips if necessary. After that, you’ll need to settle on the design. For the purpose of this guide, we’re going to assume that none of you can draw original designs. You can download lots of designs depending on the things that you like. They could be cartoons, calligraphy, maps, or a logo you had designed.
Notably, you’re better off selecting design options with more defined lines. Options like maps, calligraphy text, and 2D cartoons are great examples. Also, as you’re starting, you’ll want to use the simplest designs possible. This allows you to get a bit of experience with the wood-burning gear under your belt. However, with time you’ll be able to try out more complex wood burning designs and patterns.
Also, you’ll need to select the best wood for the wood-burning project. Different wood options react differently to the varying transference methods. As you gain experience, you’ll start to get a feel for the ideal transference method for certain types of wood.
Mentioned below are some of the best methods to transfer a pattern to wood for wood burning.
![]()
A transfer tip is likely included alongside the other wood-burning tools in your kit. You may find the instructions on how to use it in the package as well. However, these instructions may be omitted, or they may be difficult to understand. If so, here are some pointers on how to use it.
The first and most important thing to note is that you need a laser printer to use this transference method. This automatically rules out most home DIYers since people tend to buy inkjet rather than laser printers for use in their homes.
If you do have a laser printer, the next step is to flip the design backward before you print it. Once printed, you should place the paper on the wood with the design facing the surface. Use some tape to hold the sheet of paper in place.
At the same time, you want to turn on the pyrography pen with the transfer tip attached. After that, allow the tip to heat up before you put it to use. Once it is hot enough, rub the top side of the printing paper with the hot transfer tip.
Be sure to work over all the areas of the print that you can see through the paper. This should deposit the ink and the design on the wooden surface. After that, remove one or two pieces of tape holding the paper down and peel it off slowly. You want to see if the ink transference is complete before getting rid of the rest of the paper.
If there are some missing patches, put the paper back and work those sections over with the transfer tip again. When you’re done, you can discard the paper before you start burning the pattern. Since the design was flipped backward on the printing paper, it should be upright on the wooden surface.
If you own an inkjet printer, all hope is not lost. The plastic sheet transference option is one method you can use to transfer patterns for wood burning. First, you find a thin plastic sheet to put in your printer. Notably, plastic printing sheets are not available in any of the stores around you. However, you can buy a regular plastic sheet from a store near you and cut it to size.
You can use the printing paper you have at home as a template for cutting the plastic sheet before you put it in the printer. Just like the transfer tip method, you have to flip the design backward before you print. Plastic is non-absorbent, so the ink on the design should be on top of the sheet.
Follow up by placing the sheet on top of the wood with the printed side facing down. Once the sheet is on the wood, it shouldn’t be moved from side to side as it might leave ink streaks. Instead, make sure you line up the image before dropping the sheet onto the wooden surface. After that, you can use tape to hold the sheet in place while you work.
Rub the top side of the sheet, and this will deposit the ink onto the wood-burning surface. Also, don’t just rip the paper off after you’re done. Peel it slowly as you check whether the transference was successful. You can try to redo the areas with some missing lines.
Once you’re done, just clean up the side of the plastic sheet with ink and store it for the next time you’ll need it.

Next, we look at how to transfer a pattern to wood for wood burning using a sharpie. If you’ve used sharpies before, you know they release a lot of ink when used on paper. This feature is what you’ll be using to add the pattern onto the wood.
First, you can use any type of printer you have at home. Print the design on the regular paper that you use. This time there’s no reason to flip the design backward. Once printed, position the paper on the wood with the design still facing upwards. You also don’t want the paper to move as you work, so you need to hold it down with tape.
After that, pick up a sharpie and start tracing the image. According to most reviews, the Sharpie variety pack from the SHARPIE store is great since ink dries fairly quickly, and you get various tips to trace with. The ink from the sharpie will sink in through the paper and onto the wooden surface. You can press the sharpie down firmly on the paper to enhance this effect.
Once you’re done and have counterchecked the pattern below the paper, you can discard it and go about the rest of the pyrography project.
For the isopropyl alcohol method, you’ll need to print the design backward. Notably, this method only works if you’re using an inkjet printer. Also, there’s no problem with using regular printing paper.
Once you place the paper face down on the wood, you should see a faint outline of the design. After that, you should dip a Q-tip in the alcohol and then rub it on the outline of the design. The alcohol will cause the ink to transfer onto the wooden surface.
Notably, you’re using the Q-tip to control the amount of alcohol you use. If you use too much, the ink will spread all over the wooden surface and ruin the design.
Worth noting is that the ink will turn yellow on the wood after exposure to the Isopropyl alcohol.
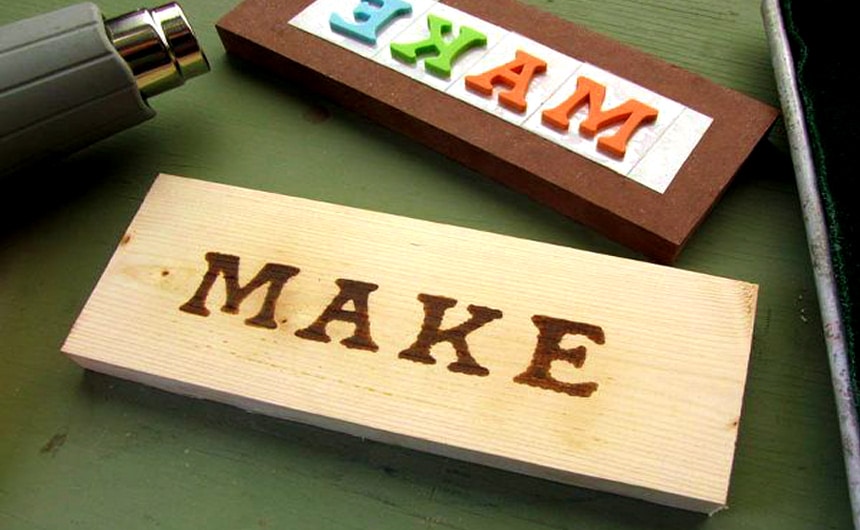
The stamp method is great if you know you’ll keep repeating the same design on different pieces of wood. However, you first need a stamp that you can have custom-made to fit your design. Once it’s ready, you use it in the same way you would a regular stamp. You dip it in ink, then stamp the wooden surface to imprint the design.
There are, however, a few critical points to note. One is that you should use lighter-colored ink. Darker tones may interfere with the burning process. Next, you should only use the stamp when the intended wooden surface is flat. Curves and bumps may interfere with the ability of the stamp to leave the right impression.
Also, only dip the stamp lightly into the ink. Additionally, you can stamp a scrap piece of paper before using it on the wooden surface. Both of these tips will help keep the ink from bleeding all over your intended burning surface.
Be firm as you press the stamp onto the wood while still ensuring the pressure is even. After that, pull the stamp up while you’re removing it. If you pull it sideways, you run the risk of depositing some of the left-over ink on other parts of the wooden surface, which can ruin your project.
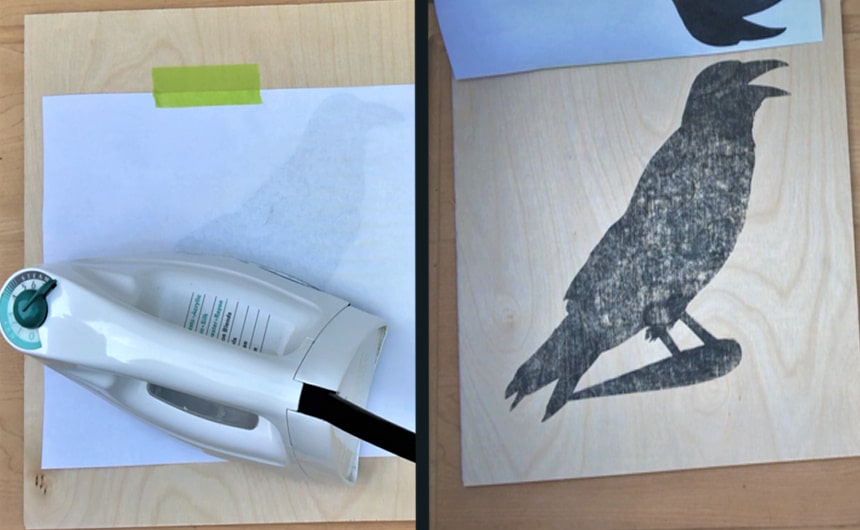
Using an iron is similar to using the isopropyl alcohol Trusted Source Isopropyl alcohol - Wikipedia sopropyl alcohol (IUPAC name propan-2-ol and also called isopropanol or 2-propanol) is a colorless, flammable chemical compound (chemical formula CH3CHOHCH3) with a strong odor. en.wikipedia.org method in that you print the design on the paper backward. However, it works best when using a laser printer. After printing, place the paper with the design side facing the wood. You should use tape or whatever you have on hand to hold the paper down.
After that, turn on your iron, change the heat settings to the cotton option and start ironing the paper. The steam setting should also be off as you do this. Iron for about 30 seconds while maintaining even pressure on the design. Avoid turning the heat up too high as that will burn the paper and the wood underneath it.
Also, avoid touching the tape with the hot iron. This should imprint the ink onto the wood below the paper. You can peel the paper off slowly to check how well the design is imprinted. If there are any problems, put the paper back and use the iron again.
Your next tip for how to transfer patterns for wood burning is to use transfer paper. This method is very affordable, and you can use either graphite or carbon paper. Print the design on paper with the right side up. After that, place your transfer paper on the wood before placing the paper with the design on top.
Secure the two papers onto the wooden surface with tape to eliminate movement. Next, you can trace the design using a fine point pen or a sharp pencil. Remember to press down firmly as you trace so you can get clearer lines on your wooden surface.
Once done, you can inspect your handiwork by peeling the two pieces of paper back. This will show you any areas that need to be redone before you remove the papers and discard them.
As shown above, there are multiple ways to tackle how to transfer wood burning patterns. You even don’t need to be good at drawing to create amazing wood-burning projects. However, you should experiment with the options available to you to find the option you prefer. Also worth noting is that most of these methods are budget-friendly and don’t require much equipment.