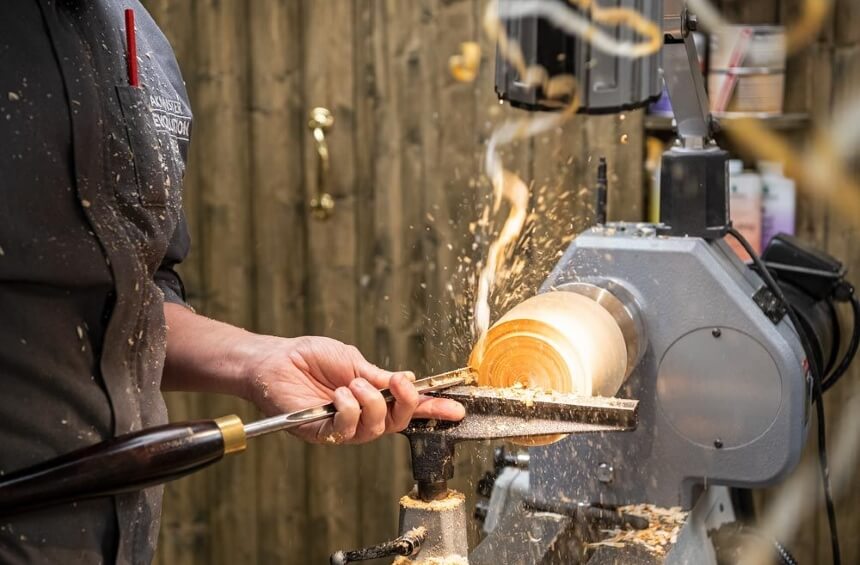
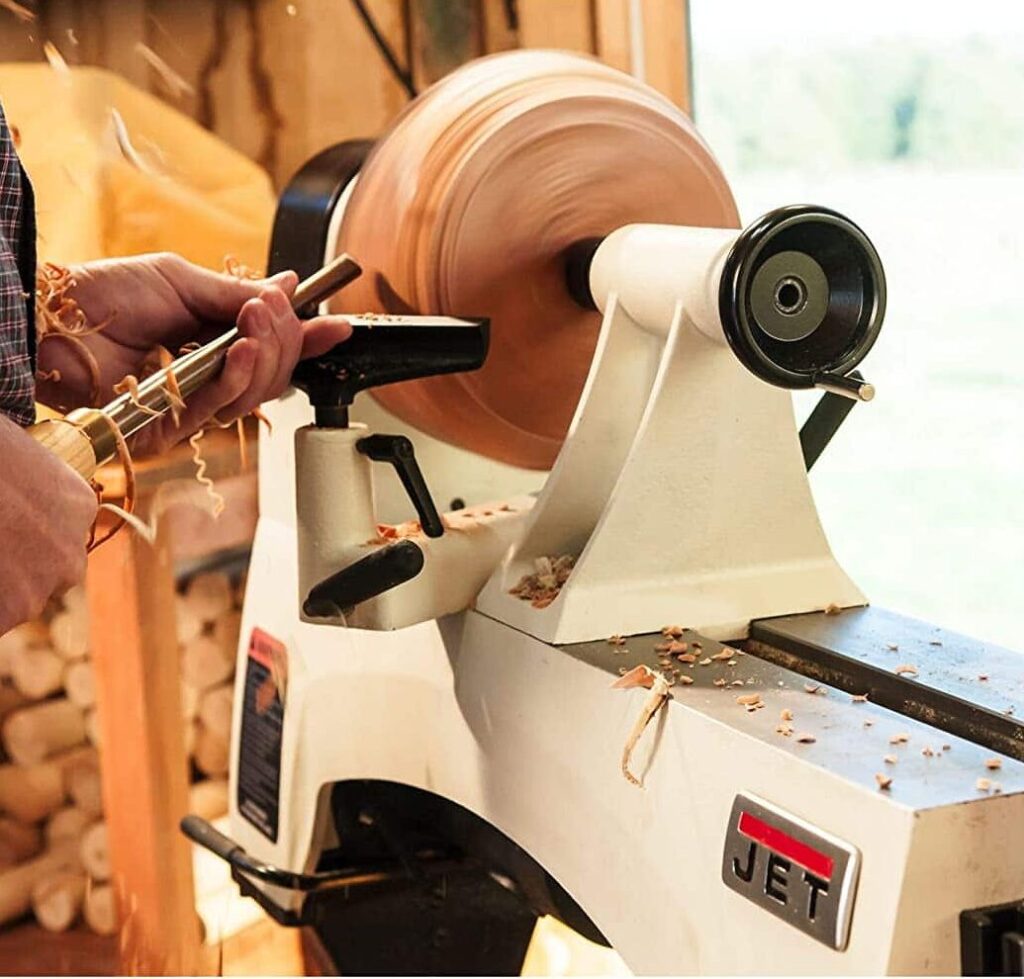
The biggest perk of owning a wood lathe and the accompanying tools is the ability to shape wood how you want. However, this ability is dependent on the tools being in tip-top shape. For the wood lathe tools, that means sharp edges and blades. Unfortunately, using these tools while shaping wood means a lot of friction is generated, leading to the edges’ dulling.
The dull wood lathe tools will thus be unable to carry out their mandate. As the user, you should learn how to sharpen wood lathe tools as that will allow you to return them to working order. You can pick up all the tips and tricks to sharpening wood lathe tools in the write-up below and use them as you see fit.
While we would like to say you should wait X amount of days before sharpening the wood lathe tools, this would simply be untrue. Sharpening schedules are irregular and will depend on what you’re using the tools for, how often you use them, the type of wood you work with, and more.
For instance, if your parting tool barely gets any use, it won’t need to be resharpened daily. The case is different for the bowl gouges you use every day. Next, consider the size of the projects you use the tools for. The larger the project, the longer you’ll have to use the tool. This translates to more friction throughout the day. Consequently, the edge will dull much faster and need to be sharpened more often.
Another thing that might affect how often you sharpen the tool is the type of wood used. True to its name, hardwood is more hard-hitting when it comes in contact with the lathe tool. As such, it is more likely to cause the edge more damage as compared to softwood. This implies that if you deal with hardwood, the tool won’t last long between sharpening sessions.
The quality of the shank material is another important factor. Different types of metals, such as steel and carbide, react differently to friction. Some will end up dulling faster than others. That said, the 8-Piece Yellowhammer Turning toolset option remains a popular one for users who want blades that dull a bit slower. The tools in the set are fitted with high-speed steel shanks that tend to outlast carbon blade alternatives.
In conclusion, what’s important is to keep inspecting the edge of the blade as that will tell you whether or not it’s time for resharpening.
We advise that you do at least one of the tests mentioned below before you start a project. Additionally, carry out an impromptu test several times during the woodturning project as well. Remember that the blade can dull even mid-project, leading to lackluster woodturning results and making your work harder.
Testing with the thumb is the most common because it only takes a few seconds and doesn’t need any equipment. You can pause the project, check the state of the tool and be back turning wood before you know it. For this test, you run your thumb across the tool’s edge. Note that we said across and not along.
Running your thumb along the edge is an easy way to cut your finger, and you will have to stop working until you have the bleeding sorted out. Conversely, you should feel a bur as you’re running your thumb across the edge. If you don’t, it means the tool is not sharp enough for the job, and you need to correct that.
An alternative to using your thumb is to use your fingernail. This time you place the edge of the blade on one end of your fingernail and drag it to the other. Dull edges will tend to glide over the nail without producing any shavings. On the other hand, if the edge is sharp, it should stick to the nail and even produce small shavings. Also, be careful not to push the tool downwards. If it is sharp enough, it might cut through the nail when you do this.
Next, you can try using a light to determine whether the edge is sharp enough or not. Admittedly you might need a magnifying glass for the best results using this method. However, making do with just a light is still possible.
Put the edge of the spindle gouge, skew chisel, scraper, or other woodturning tools under a light and then check for reflections. The tools that need resharpening will reflect some light, and it’s easier to notice that with a magnifying glass. However, those that are sufficiently sharp will remain a dark color.
For skew chisels, probably the best way to check their sharpness is to use the paper test. On the other hand, this test may not work so well for a bowl, ruffing, or spindle gouge. You hold a piece of paper by the edge, then try to cut it with the chisel. If the tool produces a clean-cut, the skew chisel should be good enough to use on a project. If, on the other hand, it doesn’t cut through or produces an uneven cut, you’re better off taking it through the sharpening stone, belt sander, or bench grinder one more time.
The last option is the end grain test. For this, you need a piece of softwood and a clamp. Clamp the wood onto a worktable, then try to slice through the end grain. Just as with the fingernail test, a sharp edge will produce shavings and ribbons. The difference is that the wood shavings will be more visible, and there is almost no risk of injury.
Blunt edges will push on the end grain without being able to cut through. It’s very easy to get the results wrong because even dull edges can cut through the wood when going with the grain. This is why the end grain is recommended for the test.
Having confirmed that the edges are dull now, the real work begins. There are three primary methods of sharpening lathe tools. They include using a sharpening stone, a belt sander, or a slow-speed bench grinder. You can pick one depending on the equipment you already have or are willing to buy and the results you hope to achieve. As you can probably guess, their effectiveness varies from option to option.
The first way to sharpen woodturning tools is to use a sharpening stone Trusted Source Sharpening stone - Wikipedia Sharpening stones, or whetstones, are used to sharpen the edges of steel tools and implements, such as knives, scissors, scythes, razors, chisels, hand scrapers, and plane blades, through grinding and honing. en.wikipedia.org . One significant benefit of using a sharpening stone is that it doesn’t remove a lot of material from the wood lathe tool. This means the tool will last longer in your toolbox before it has to be replaced.
When using the sharpening stone, the thing you have to watch out for is the bevel angle. It can be challenging to keep the woodturning tool straight as you move it across the surface of the stone. This is because the handles are relatively heavy.
What most people are opting for is to use the smaller and thinner diamond stones available. This allows you to move the stone instead of the woodturning chisels.
After that, place the stone on the bevel while ensuring that both reference points come into contact with the grit. While applying light pressure, move the stone around the bevel. If it is something flat like the skew chisel, you don’t need any extra steps to finish sharpening the tool. On the other hand, there are gouge tools that have rounded bevels. Make sure to account for that as you’re moving the stone back and forth.
Admittedly you may have to do this every 5-10 minutes during a project. However, doing that consistently means that you don’t have to use the belt sander or bench grinder to sharpen the tools, and that will expand their lifespan.
Next, we tell you how to sharpen woodturning chisels using a
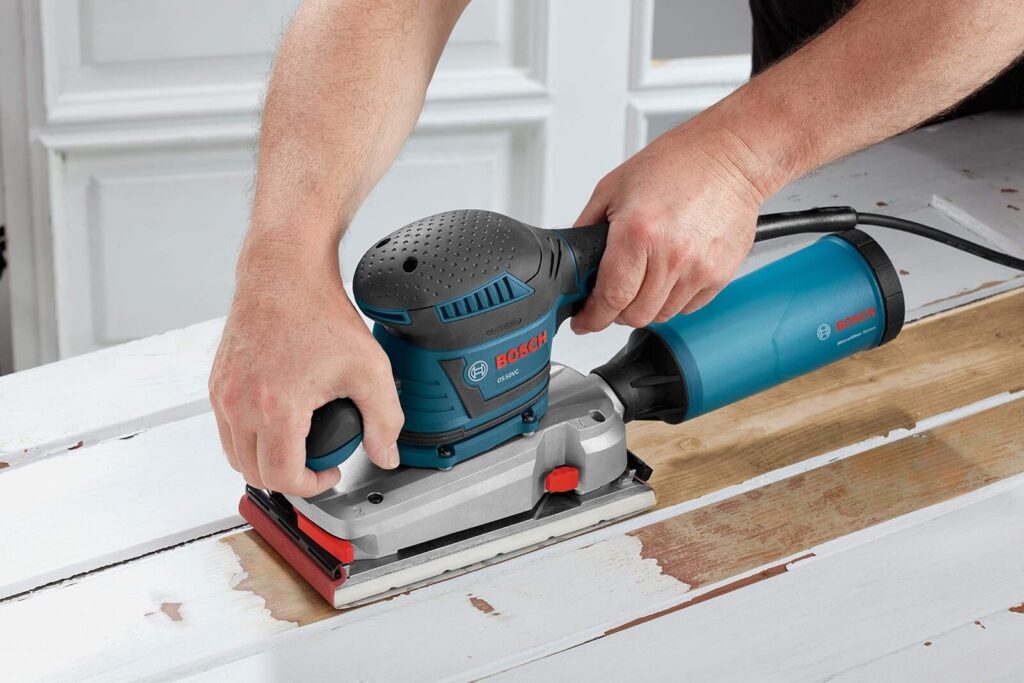
belt sander
Trusted Source
Practical guide: Using machine tools - BBC
A sander is a machine with a rotating abrasive belt used to remove waste material from woods for shaping or rounding off edges.
A belt sander is a machine with a rotating abrasive belt used to remove waste material for shaping or rounding off edges.
An orbital sander has an orbiting abrasive pad that is used to smooth surfaces or remove blemishes and marks.
www.bbc.co.uk
. Anyone who doesn’t want to purchase the bench grinder due to the high cost can choose the belt sander instead. Pick a two-inch belt option or larger as the alternative doesn’t offer enough real estate to sharpen most gouges evenly.
The belt sander allows you to pick the grit you want to work with from the options available. You can change this at any time, and it will only take you a few seconds to complete. Another thing to note is that you should avoid any belt sander that has a flexing platen. If you use such a machine, you’ll end up rounding the cutting edge and ruining the result.
It’s important to note that some sanders have adjustable speed while others don’t. Factor this you’re your considerations before you make the purchase. The multi-speed option is preferred. That said, you can still make it work with the one-speed option.
Now it is time to turn on the machine and start sharpening. Hold the bevel of the lathe tool against the rotating belt. Ideally, the belt should touch the two reference points we mentioned before, including the heel and edge. If you sand the area between these two points, the gouge or chisel will go back to being sharp.
The friction between the belt and the gouge is much higher in this situation than when you’re using a sharpening stone. As such, extra care is needed; otherwise, you’ll end up taking too much metal from the tool.
Additionally, if you don’t get the placement of the bevel right, you may end up changing the shape of the tool completely. This is why it may be a good idea to get a sharpening jig. If you have one, you can maintain the required angle of the bevel effortlessly until you’re done sharpening the woodturning tool.
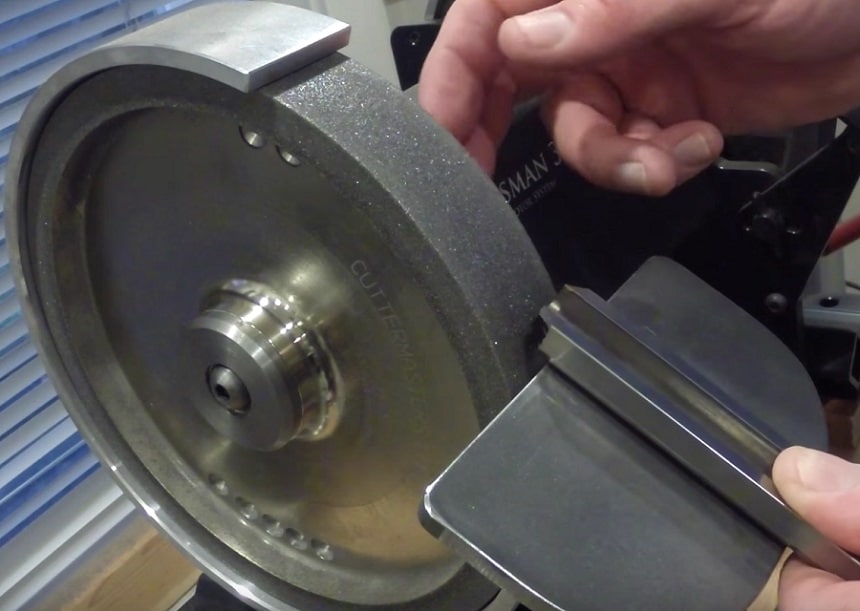
The last option at your disposal is to sharpen woodturning tools using a slow-speed bench grinder. Many veterans have the bench grinder somewhere in their workshops and have been using it to sharpen their tools for a while. This is because it’s useful for re-shaping the bevel when needed. Often this is done when the lathe tool is relatively new and periodically after that.
Unfortunately, the device is pricey, which can put some of you off from buying it. However, it might prove a worthy purchase if you plan to tackle more woodturning projects with time.
When buying your first grinder, ensure it is 6” or larger. Anything smaller, and you might find it hard to hit the correct angles when sharpening your lathe tools. That said, the size that most experts recommend is about 8”.
The machine should also come with an adjustable tool rest. Like the sharpening jig we mentioned before, this part of the tool will help you maintain a constant angle while sharpening any tool. You can also use both the jig and tool rest to ensure you get the best results.
For most of the lathe tools, you find the bevel angle and then adjust the tool rest accordingly. To do this, you mark the middle of the bevel with a marker, then touch the tool to the grinding wheel. Use your hand to turn the wheel while also adjusting the angle. When the ink is erased from the bevel, you have found the right angle.
After that, you turn the machine on, hold the tool down on the tool rest and push it towards the spinning grinding wheel. For the scraper and gouges, you’ll have to roll the tools since they have rounded tips. Remember to use light pressure while pushing the lathe tool against the grinding tool; otherwise, you’ll lose a lot of the metal in the shank.
You should now be ready to take on your next woodturning project. As a side note, you will need a grinding dressing tool as an accessory for the slow-speed bench grinder. This accessory helps you remove metal on the surface of the grinding wheel, flattens it, and exposes fresh abrasive.
The Rikon Professional slow-speed bench grinder is, according to previous users, one of the go-to options when sharpening wood lathe tools. The anti-vibration feet to help prevent mistakes, in addition to the spark resisters and safety eye shield, are some of the reasons why it is so highly rated by users.
Seemingly you might have to sharpen your lathe tools as often as several times a work session. As such, you can’t leave the job to anyone else. This necessitates you make a point to buy the necessary tools such as the sharpening stone, belt sander, or bench grinder and learn how to sharpen wood lathe tools.
Like many of the skills you need for woodturning, you’re not going to be automatically good at sharpening the tools. You’ll have to practice until you get the hang of it. That said, bookmarking and referencing this write-up every time you need it may help can help you a long way. You can also ask questions in the comments section below if there’s anywhere you need extra clarity.