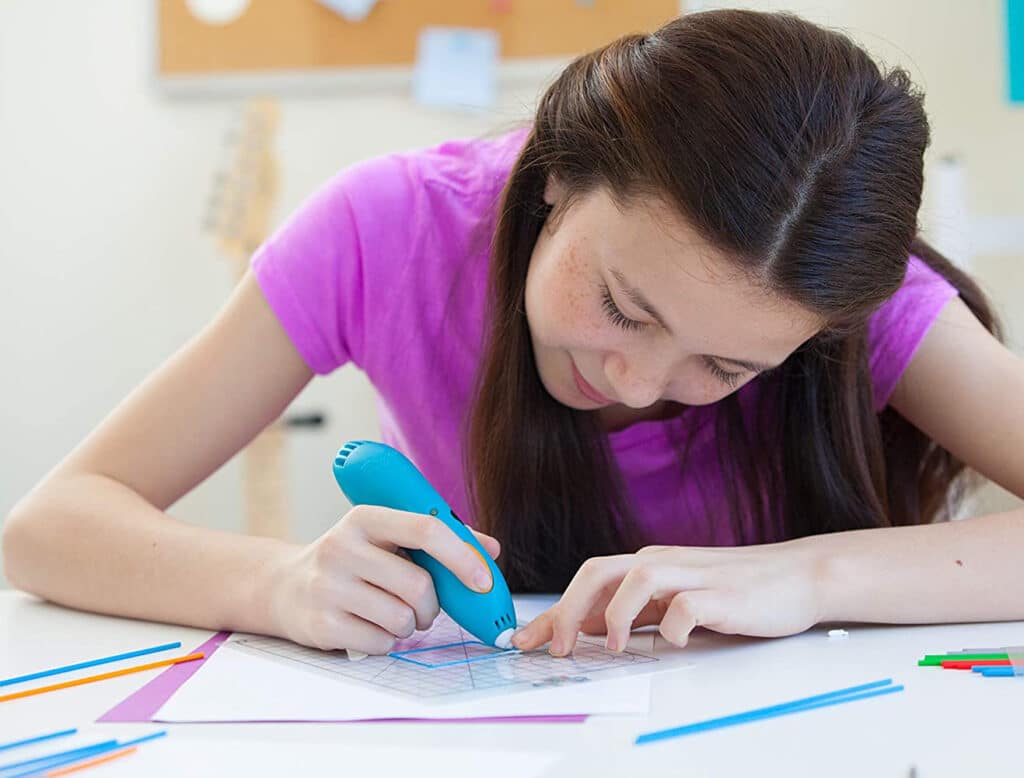
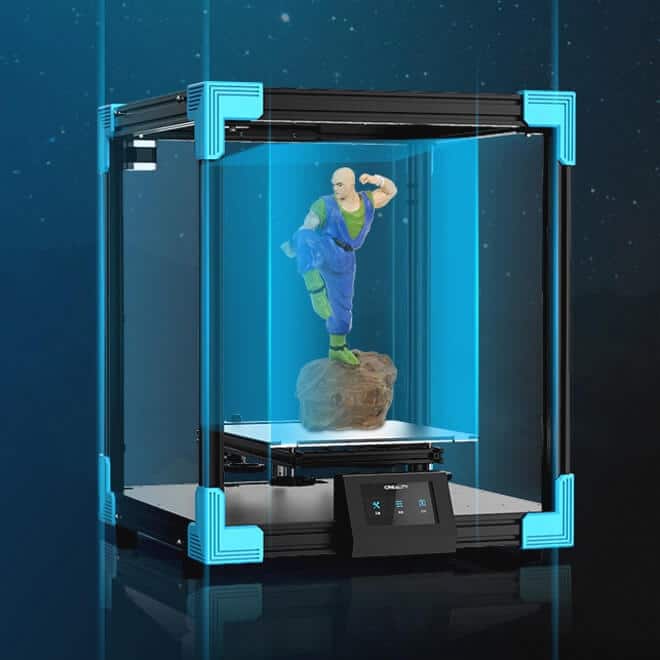
Many people are interested in how to speed up 3D printing, but they are concerned about compromising the quality of their work. However, if you are running your 3D printer at lower speeds you’re not going to tap into the full potential of your machine. Even the best budget-friendly 3D printer can be extremely productive, if you print at a higher speed. So, how fast can you go without compromising the quality of your 3D models?
When looking at how to speed up 3D printing times it’s natural to experiment with the various settings of the printer. There is a point where you can print faster and still achieve the best results. But, there are a number of factors to consider to achieve this goal and that will be the focus of this article. If you’re new to 3D printing this material may seem complex, but if you take your time it will start to make more sense.
As you might imagine, the speed setting will be the main factor that determines the printing speed of your project. The main speed setting controls the speed of the motors and how they work along the X and Y axis. If the printing is too slow, it can cause deformation in the nozzle because it’s sat on the plastic for too long. If the printing is too fast, it can cause overheating leading to unwanted artifacts that mar the quality of your model. Other problems can include: under extrusion, ringing and weak layer adhesion issues. So, the goal is to increase the printing speed without sacrificing too much of the quality and avoiding these types of issues. Before you begin a project it’s a great idea to think about the level of printing quality that you need. If you’re just doing a test print of working on a template you can print faster and better quality can be achieved at a slightly slower printing speed.
 Secondary Speed Settings
To get the optimal printing speed for your project, it’s a good idea to consider these four secondary settings carefully:
The travel speed is the adjustment that determines how fast the print head moves when it isn’t extruding plastic. If you’re interested in how to speed up 3D printing, this is one of the easiest methods. When you increase the travel speed, you can lower the printing speed significantly, but if you push it too far it will lead to ghosting or ringing artifacts. In extreme cases, the layers may be misaligned and the entire print will fail. To find the optimal travel speed for your 3D printer consider running a test print first using a variety of travel speeds. Start out at 100mm/s and increase the speed in 5mm/s increments while checking for artifacts and misaligned printing layers. When you want to learn how to calibrate a 3D printer and optimize the printing speeds test printing is advisable.
The retraction speed is how fast the filament is pulled back before the print head moves. This is an important setting to reduce the level of stringing and to improve the overall printing quality. If the retraction speed is too slow, you may notice blobs and strings of plastic on the surface of your printing. If the retraction speed is too fast, you may also notice filament grinding which leads to blobbing and stringing on your projects.
The retraction speed for your 3D printer can be determined with a retraction speed test. Start out with a retraction speed of 25mm/s and increase the speed gradually in 5mm/s increments. As the printing progresses look for signs of strings that may develop across the spikes on your model. The optimal retraction speed should be the highest speed that allows you to print without impeding the efficient flow of filament.
When it comes to retraction speeds there are two main secondary settings to consider, they are:
Learning how to use the retraction speeds to your advantage when 3D printing can take some trial and error. But, the effort will pay off when you find the optimal balance of speed and quality that can take your printing to the next level.
 Best ways to speed up 3D printing
Let’s take a way at eight ways that you can improve your 3D printing speeds without compromising the quality:
This may seem like the logical answer when you want to learn how to speed up 3D printing times. However, you may be surprised to learn that adjusting the printing speed doesn’t have a dramatic effect on printing times. Overall, you will find that the speed settings in the slicer will be more effective and this is especially true if you’re printing a bigger object. When you print you may have sufficient room to increase the printing speed without sacrificing the quality. Gradually increasing the speed is advisable and you may need different speed settings for specific parts. Even the best 3D printer under 1,000 dollars will benefit during infilling and printing perimeters when you use the correct printing speeds.
The tradeoff between quality and speed can be a difficult balancing act and finding the exact settings for your printer is essential. In many cases, a high infill speed would be followed with average support material and perimeter speed, followed by a lower speed for the external perimeter and gaps/bridges. The best 3D printer for ABS and other tasks should have clear guidelines on how fast they can print efficiently. But, you can take further steps (shown below) that can increase your printing speeds significantly.
Another effective strategy is to reduce the wobble of the 3D printer to make the platform more stable for faster printing. If you want to take this to the extremes, you can add lighter parts to reduce the level of inertia in the printer which will dampen vibrations. But, you can improve the stability by carefully tightening belts, rods and screws. Reducing vibrations is a great way to improve printing speeds without compromising on the quality in your prints.
Movement efficiency is important when you want to increase speed on overhangs and sharper corners without any accompanying quality issues. Depending on your design, you may be able to tweak the 3D printing speed without too many problems. Another option is to increase the inner wall speed to match the overall print speeds. This differs from the Cura default at half speed but it can reduce printing times and still deliver astonishing levels of quality.
The Infill Density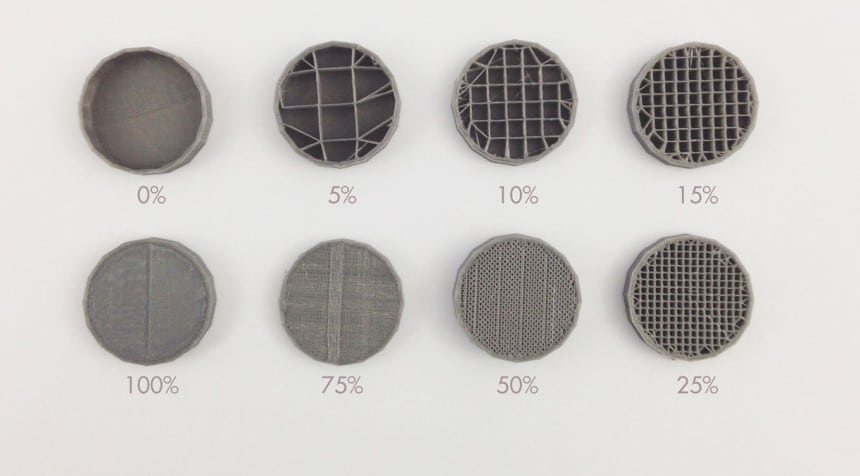
An infill density of 100% is solid and a 0% density is hollow. When you have a hollow print it will be faster to print because less movement is needed. The inverse is true, so it’s important to gauge the level of density that you need for your print. If you can find a good infill density balance you can fulfill your needs and print at higher speeds. As an example: if you need a functional print to hang a heavy object on a wall, you’re going to want an infill density of 100% to increase the strength. But, if you only need to hang a lighter decorative print you can go with a lower infill density to save time and material.
Many people go with an infill density in the 20-35% range which can be strong enough if you have a good design. A well-conceived pattern will increase the strength and yet you may only need a lower infill density. In fact, with a cubic infill you may be able to go as low as a 10% infill density without compromising the strength of your print. As always, the tradeoff is between the amount of material that you use, the required strength and the optimal printing time. If you’re using 80-100% infill density it’s important to understand that you may not be getting the return that you expect for the level of material used. So, it makes good sense to avoid very high infill density settings unless you need a very dense object to meet a specific need.
The Infill Pattern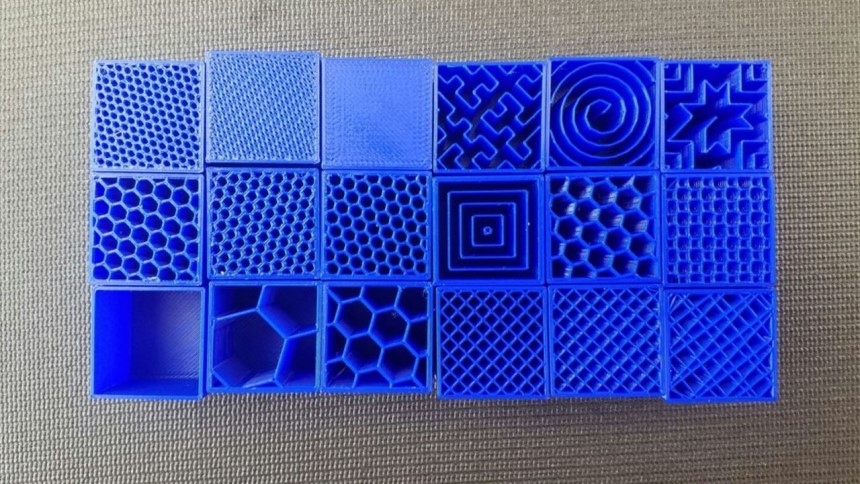
There are many types of infill patterns to choose from and they all have their unique strengths and weaknesses that you need to consider carefully. An infill pattern that prints quickly is desirable because it can really reduce the overall printing times. One of the best infill patterns is the rectilinear or “lines” pattern that requires lower levels of simple movement to print. It’s estimated that this pattern can reduce printing times by around 25% depending on the 3D model you’re printing.
Again, the tradeoff is between the speed of printing and the strength of the object. Certain patterns are stronger than others, but they will increase the printing times significantly. Striking the right balance is essential if you want shorter printing times without sacrificing quality. The best infill patterns use triangles or grid patterns to increase strength without using too much material. A honeycomb pattern is very strong, but the level of detail requires more head movements which increases the printing time.
A good way to add strength is to widen the extrusion in the slicer to add walls and perimeters to your 3D models. When more walls are used and they are thicker the strength can be increased in a more efficient manner than raising the infill density. Using a 3D Gyroid infill pattern can also add top layer support and strength and it can be a faster way to print.
The acceleration settings determine how fast it takes for the print head to reach the top speed for your machine. If you have a lower acceleration, you will notice that your printer never seems to reach the top printing speed on smaller to medium sized prints.
The jerk settings determine the speed of the print head when it moves from the still position. The print head needs to move smoothly, if it’s too quick it can jerk and this will compromise the print. This setting also determines the speed that the printer jumps to before you factor in the acceleration.
If you choose a high jerk setting you can reduce the overall printing time but it will introduce significant levels of mechanical stress on your 3D printer. The higher levels of vibration can decrease the quality of the print and you need to find a balance that works for you. The optimal settings for the acceleration and jerk value are closely related and it’s typically a good idea to have both at a middle value speed. This can vary depending on your print, it may be possible to switch to a higher or lower speed to find the optimal setting.
Think of acceleration values as a range rather than a set number because there are factors that can alter it during a print. You can test the jerk settings with a vibration test cube to see if there are any visible vibrations on edges, corners and letters. If you can see a vibration on the X axis it’s caused by a vibration on the Y axis and vice versa. Using a max speed acceleration calculator will inform you when the printer reaches the set speed and the length of time across each axis. The path of the effector is represented with a curved yellow line and the speed that the printer jerks up to is represented with a blue line. Printing at speeds below the jerk speed sacrifices precision.
When comparing a lower jerk value of 10 to a higher jerk value of 40 it has been noted that a 60mm/s speed made little difference to the printing time. However, the lower jerk valve did increase the quality of the printing. When the printing speed was increased to 120mm/s the difference between these two jerk values was a 25% reduction in the overall printing time but the quality was diminished significantly.
The Wall Thickness and Shells
Before you consider altering the wall thickness, it’s important to understand that this is related to the infill density. When you have the ideal ratio between this pair of settings, you’re more likely to get a strong and successful print. Finding the right ratio for your print can be a process of trial and error and recording the results is essential. Generally speaking, a low wall thickness and low infill density will create prints that lack sufficient strength. So, these settings should only be used on display models, decorative prints or prototypes. When the number of shells and perimeters is decreased the printing times will be faster and you can balance this against your need for strength. A wall thickness of 0.8mm or double to typical nozzle capacity and a wall count of 3 will work well with most prints.
The layer height can be adjusted automatically for the angle of the layer. This is known as adaptive layers or as the dynamic layer height and it’s one of the stand out features in Cura. This can speed up the printing time when compared to the usual layering process. This works by determining the areas that have the most significant variations and curves. The printing is matched to that area to provide thinner or thicker layers as required. A curved surface is printed with thin layers so it will still look and feel smooth. A recorded print of a chess piece with no adaptive layers to 2 hours and 13 minutes to finish. The same print with adaptive layers took only 1 hour and 33 minutes which equates to reduction in printing time of 30% with no loss of quality.
Printing Multiple Objects
If you want to make the most of your printing efforts you can increase efficiency by making use of all the space on your printer bed. Limiting your printing to one object at once increases the overall printing time and you need to reheat and reset the printer each time. Of course, you can’t do this with any object that takes up more than half of the printing space. But, if you’re printing smaller projects you can copy and paste that item to create multiple prints at the same time. The size and shape of the prints is important and you may need to orientate them to print efficiently. Don’t forget about the height of your print bed when you want to print more than one item. Even if you have a smaller 3D printer you can increase efficiency to speed up your printing efforts.
If you can reduce the amount of support material extruded by your printer you can shorten your printing times. If you can remove the supports, you will notice that the print time is significantly shorter compared to standard printing. There are many 3D printing techniques that require little to no support to consider. Adopting this style of printing takes practice, but it’s extremely efficient and you don’t need to sacrifice strength or quality. Choosing the ideal orientation for your 3D printed models will help you to stop relying on the use of thick supports. Simply adjust the orientation of your print and add custom supports to the model where you feel they are needed most. Pay close attention to 45º overhanging angles when orienting your models for the best results.
For many people that use a 3D printer professionally, it makes good sense to reduce printing times. The boost in productivity and the need for fewer resets will make a significant difference for any business. But, the same holds true for hobbyists that want to make the most of their limited printing times. If you are on a tight deadline you can use one or more of the printing tips in our article to get your print finished on time.
As you can see, when learning how to speed up 3D printing, there is no need to sacrifice the quality of your print to increase the printing speed. With a little advance planning and some minor adjustments, you can have the best of both worlds. If you start to look at how you use infills, supports and the density of your prints you can use less material, print quickly and maintain the strength of the object.
Even if you have the best 3D printer controller it will not speed up your printing times if you don’t make some adjustments. One of the key things to understand when you investigate how to speed up 3D printing is that every print is different. Making adjustments to meet the exact needs of your project is essential if you want to print quickly and efficiently.